Use “Blog Post” templates quickly with RomethemeKit. Here’s a comprehensive article to explain each method in detail.
follow the step by step instructions:
Step 1: Use Blog Post
- Go to Menu Romethemekit, and you will be able to see Blog Post Widget.
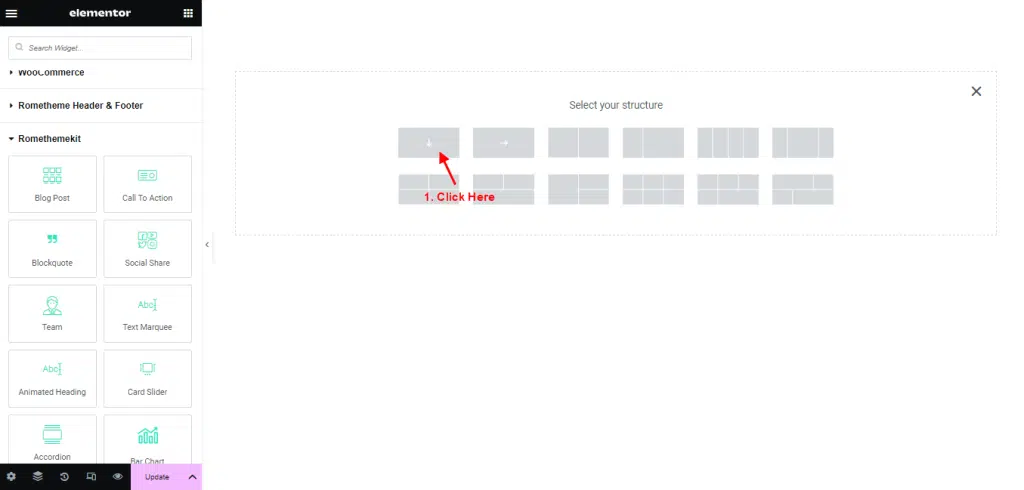
- Click Add New Container.
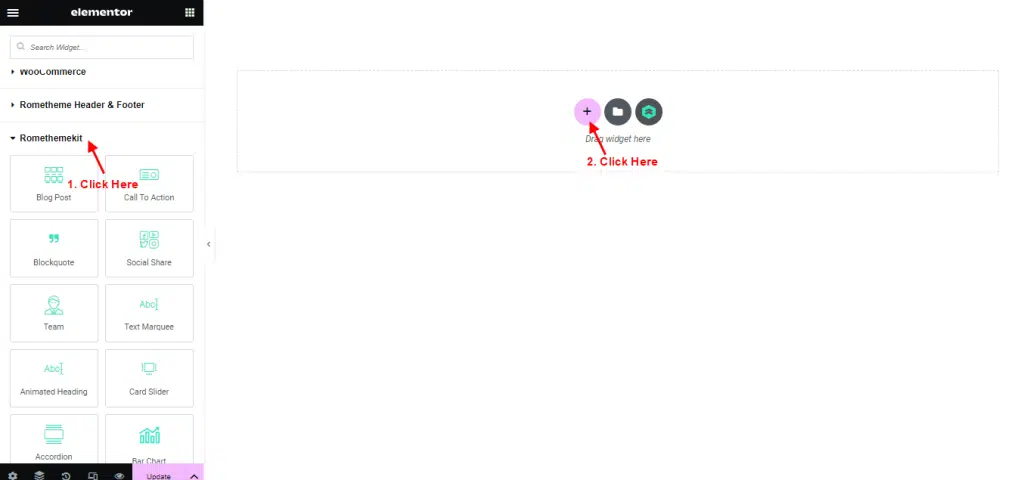
- On the canvas, select your structure.

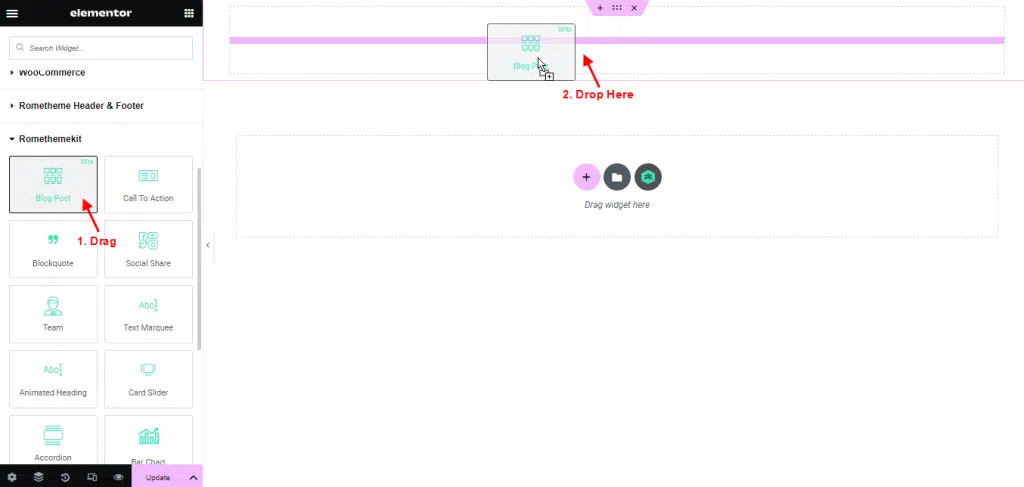
- Drag Blog Post Widget from the Elementor and Drop it on the selected area.

Step 2: Use Blog Post From Pre-Made Templates
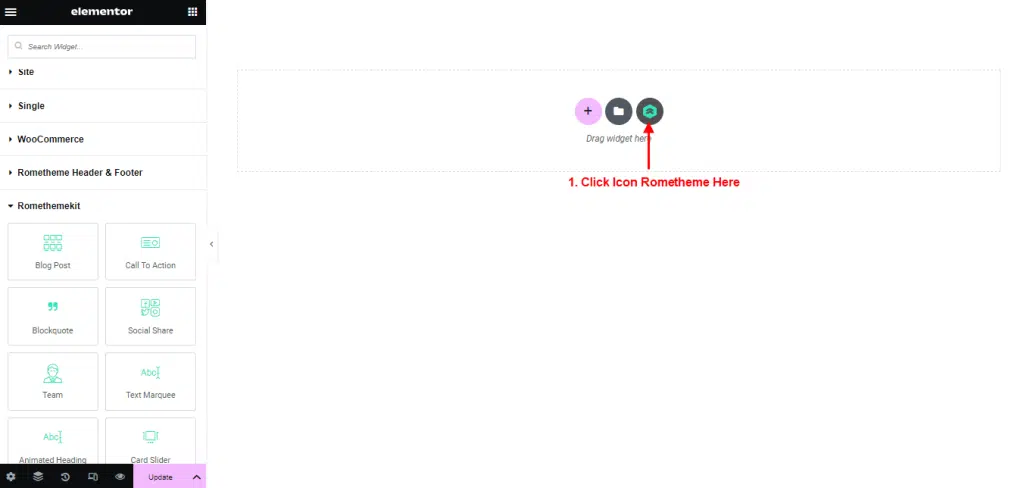
- Click on the RomethemeKit Icon to insert blog post from our premade templates.

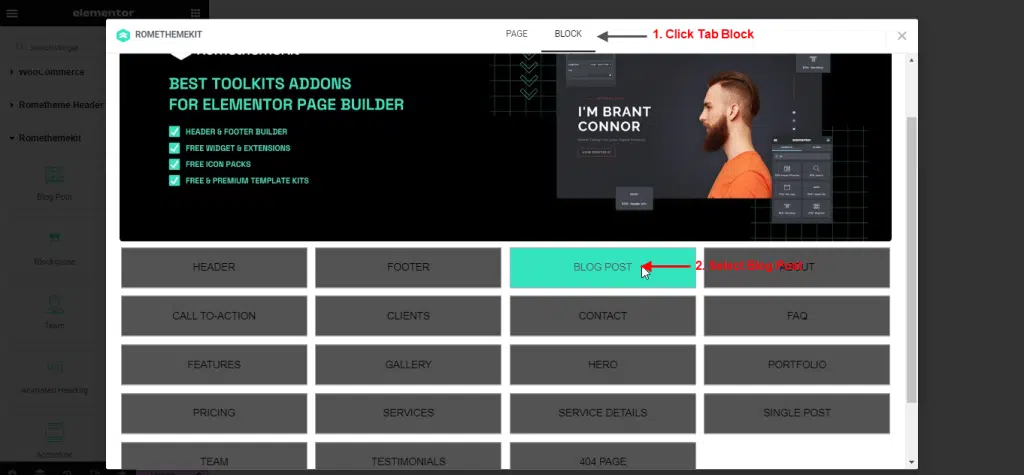
- Click Tab “Block” and Select Blog Post.

- Select your Desired Template.
- Click Import to add or click Preview to show the demo.
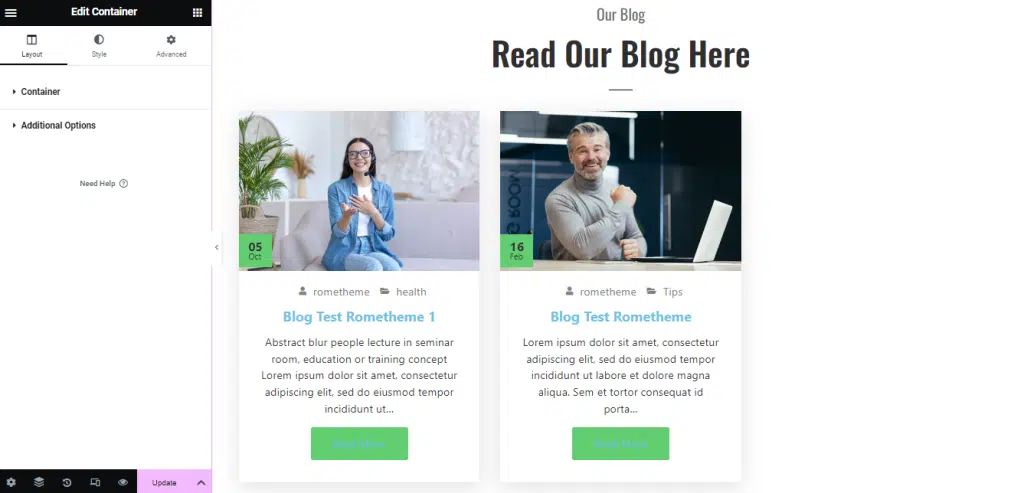
- You can see your template Blog Post showing.

Step 3: Customize Blog Post
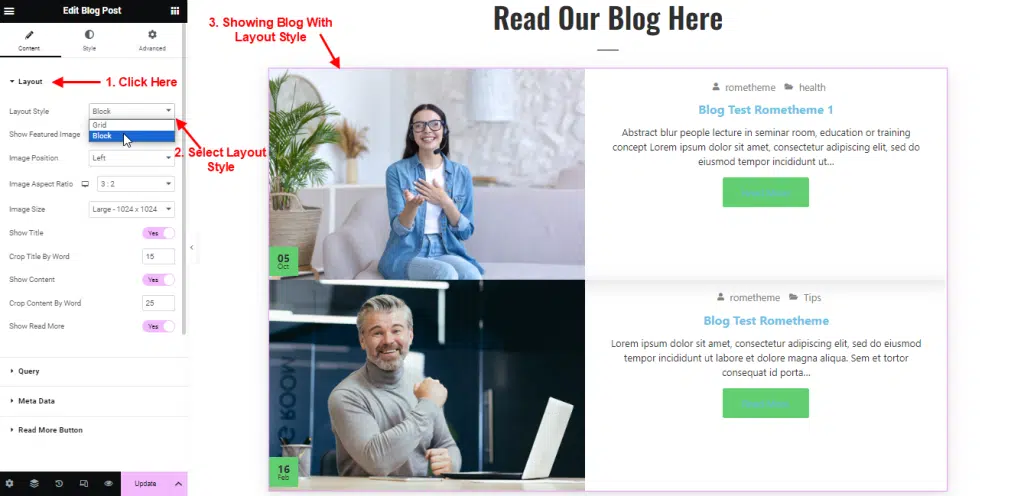
Layout
- Click Menu Layout
- Select Layout Style : grid or block

Setting Content
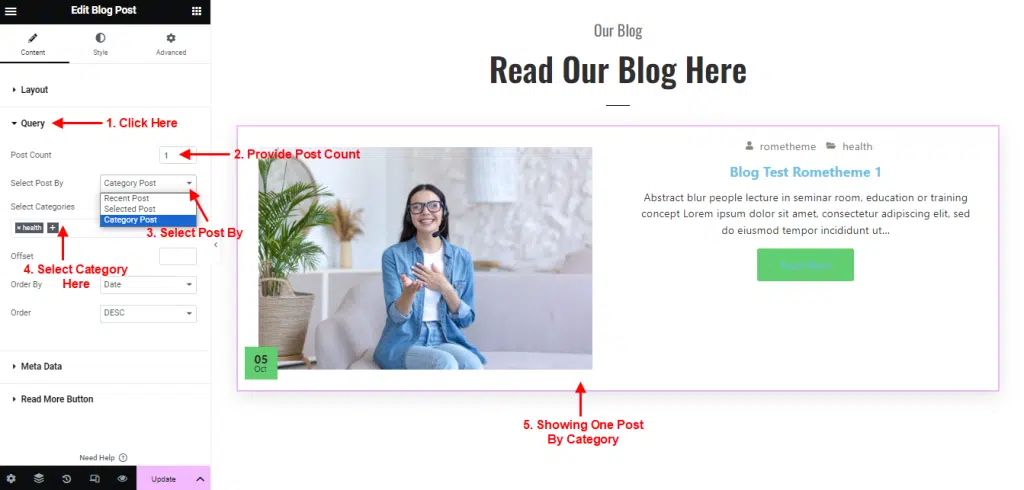
- Click Menu Query.
- Select Post Count and Select Post By : category.
- You can also select recent or select post.
- Showing only one post by category.
Read More Button
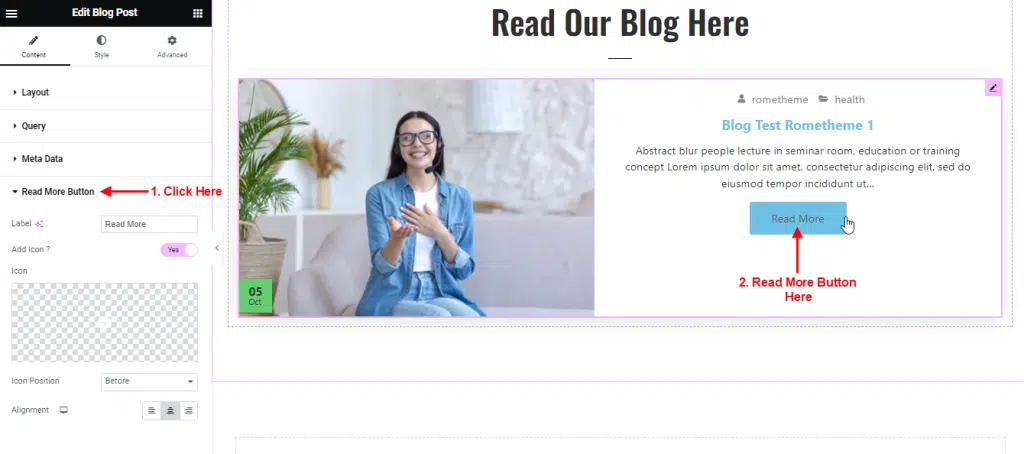
- Click Menu Read More Button.
- Edit Label.
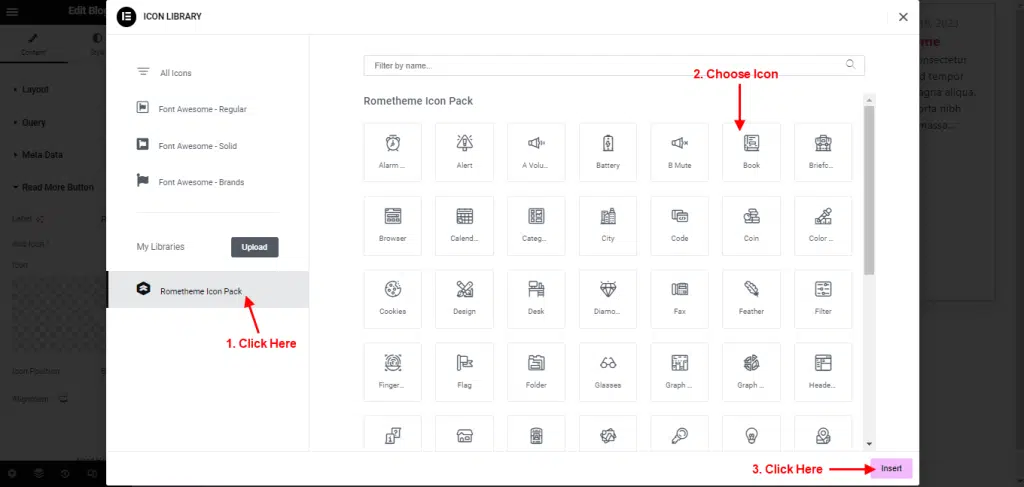
- Select Yes to add icon → Click Icon Library.

- Click Rometheme Icon Pack → Choose Icon → click Insert.
Setting Image
- Click Menu Style → Featured Image.
- You can setting image size in the margin and padding.

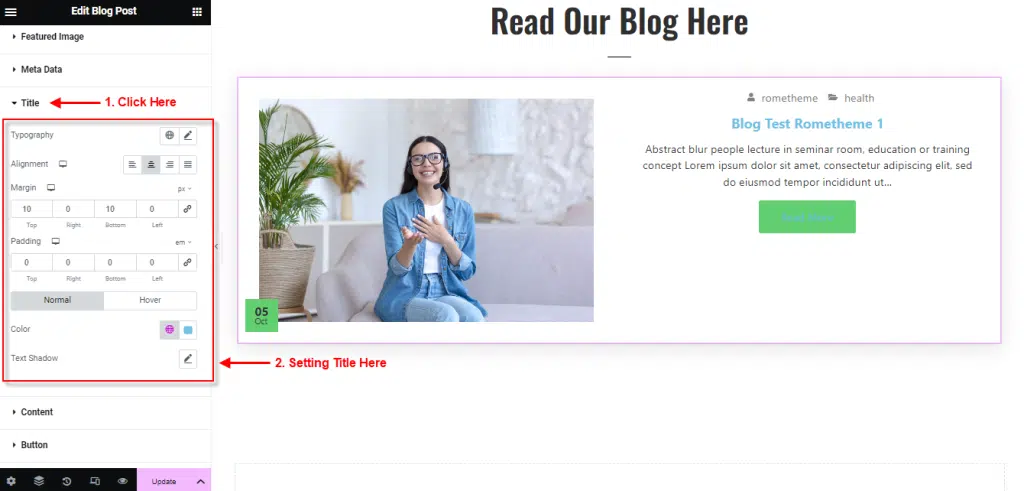
Setting Title
- Click Menu Style → Title.
- Setting Alignment.
- Setting title size in the margin and padding.
- You can change title color, click color box → select your color.