Create all kinds of “Header & Footer” templates quickly with RomethemeKit. Here’s a comprehensive article to explain each method in detail.
follow the step by step instructions:
Make sure you have installed the plugin
Step 1: Create Header and Footer
- Navigate to RomethemeKit → Header & Footer → and click Add New.
- A popup box will open with options.

- In the popup box type a Title, and select the Type → Header or Footer.
- Toggle the Activation option → and click on “Save changes“.

- Select your Header → from the Header & Footer Page area.
- Click on Edit With Elementor.

- On the canvas, → Choose your structure.
- Select the widget from the Elementor Block and drop it on the selected area.
- Also, you can add any type of widget from here.

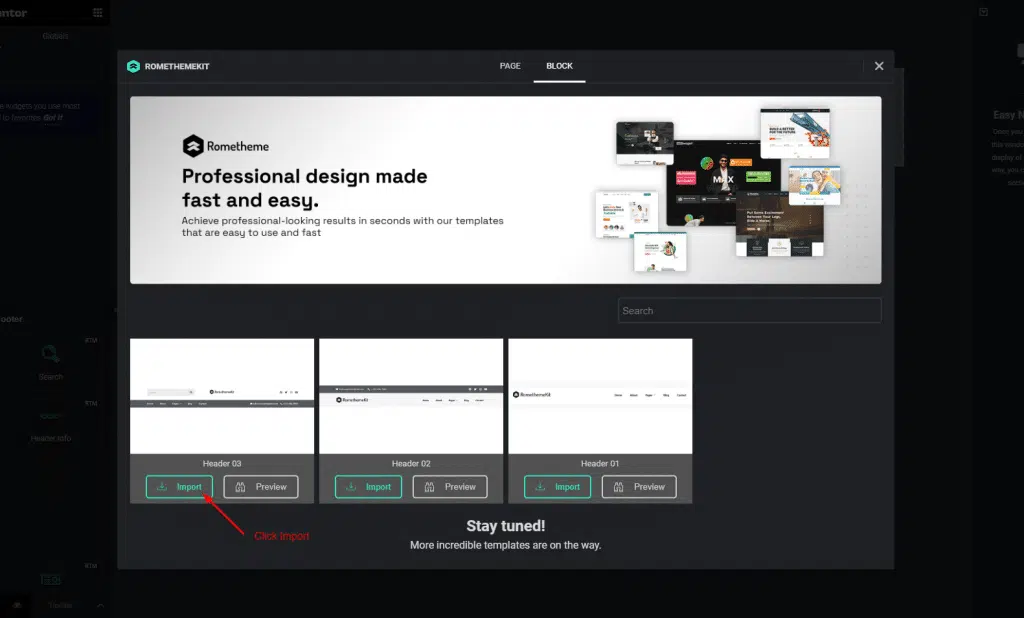
Step 2: Create Header from Pre-made Templates
- Click on the RomethemeKit Icon to insert header from our premade templates.

- Select Tab “Block” and Go to Header -> Select your Desired Template.
- Click on the Import button to add or Preview to show the demo.


- You can see your selected Header template showing.
- Now click on the Selected Nav Menu area -> Select your Menu from the drop-down. (If you don’t know how to create a Menu, please check the guide here.
- Once done, click the Update button to save the menu.

- Now go to your site and you can see your selected Header Template is showing accordingly.