Show your awesome Team Member by using RomethemeKit Widget in a very easy way.
follow the step by step instructions:
Step 1: Use Team Member
- Go to Menu Romethemekit, and you will be able to see the Team Widget.
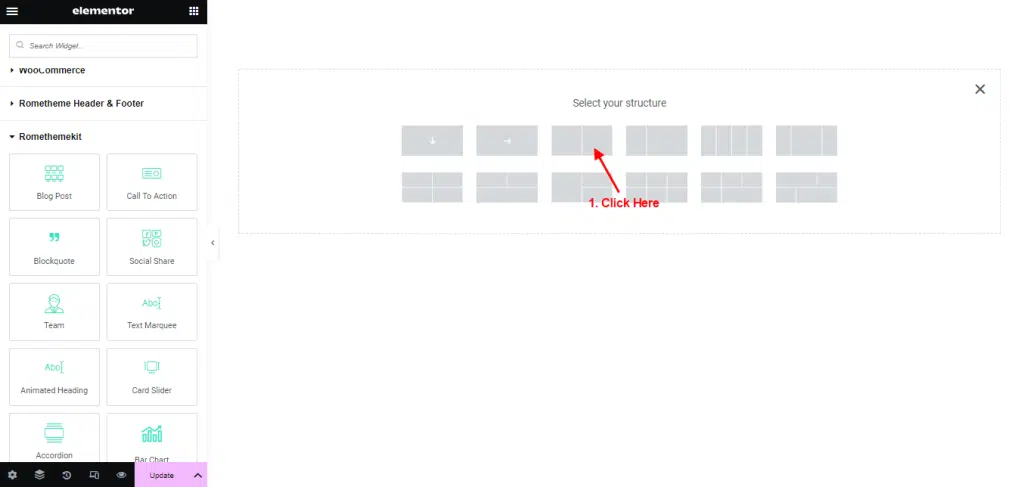
- Click Add New Container.
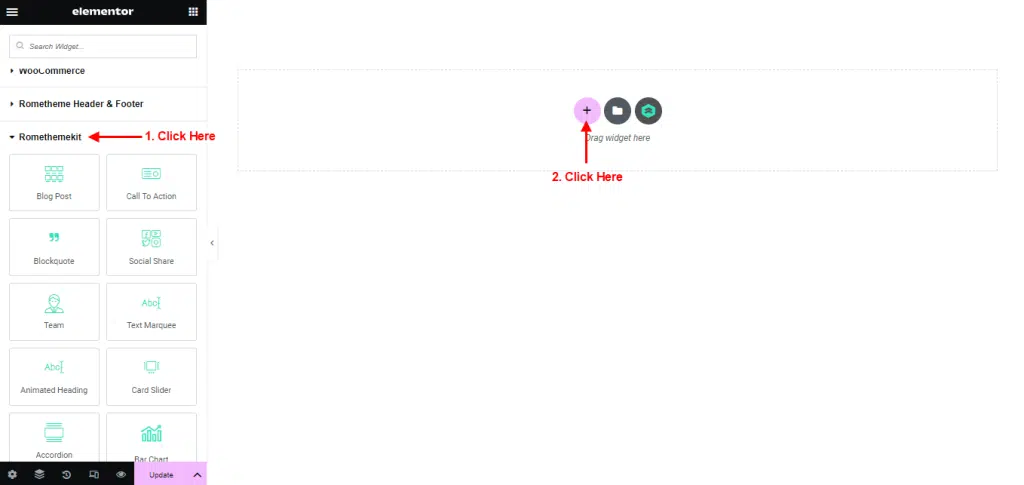
- On the canvas, select your structure.

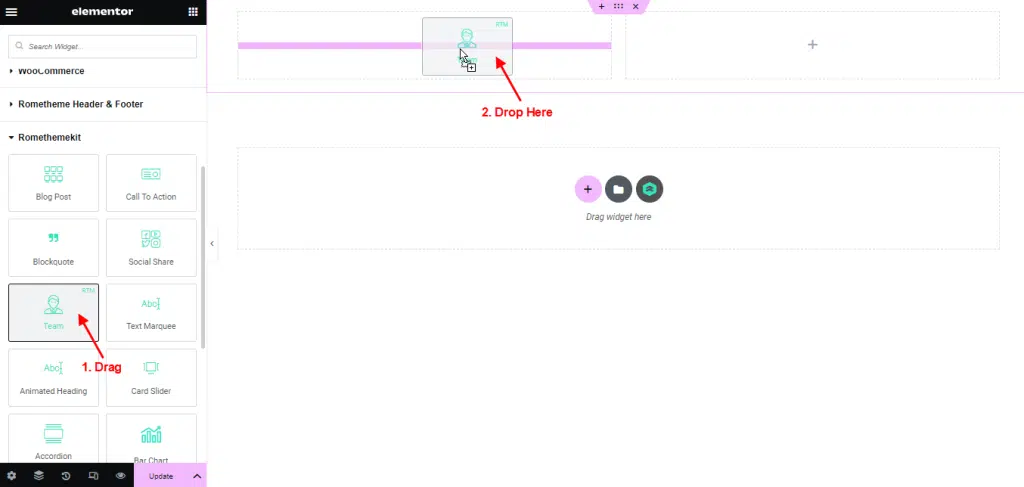
- Drag the widget from the Elementor and Drop it on the selected area.
Step 2: Use Team Member From Pre-Made Templates
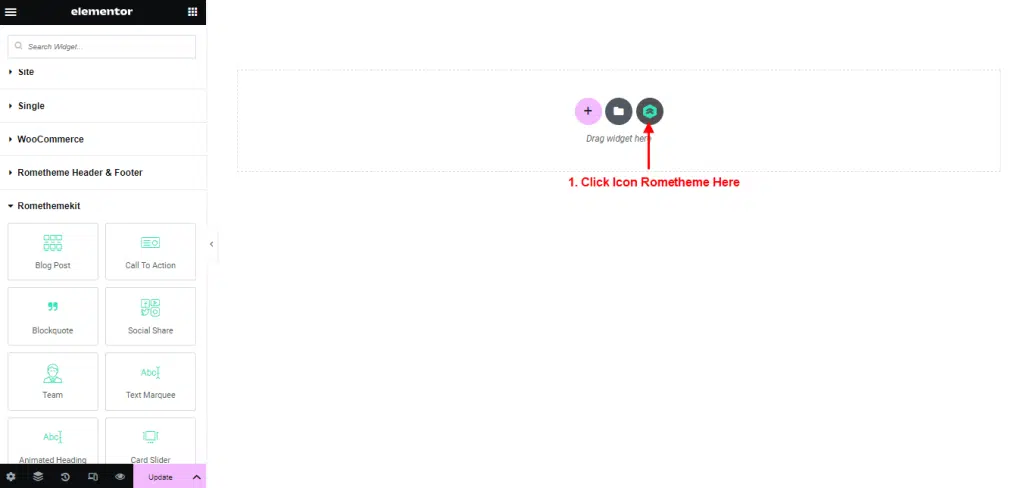
- Click on the RomethemeKit Icon to insert team from our premade templates.

- Click Tab “Block” and Select Team.

- Select your Desired Template.
- Click Import to add or click Preview to show the demo.
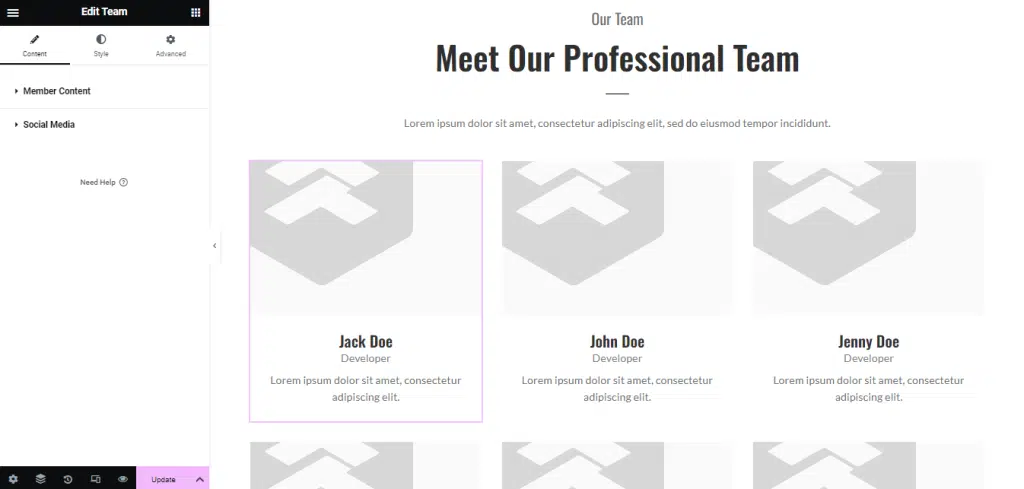
- You can see your template Team Member showing.

Step 3: Customize Team Member
Upload Image
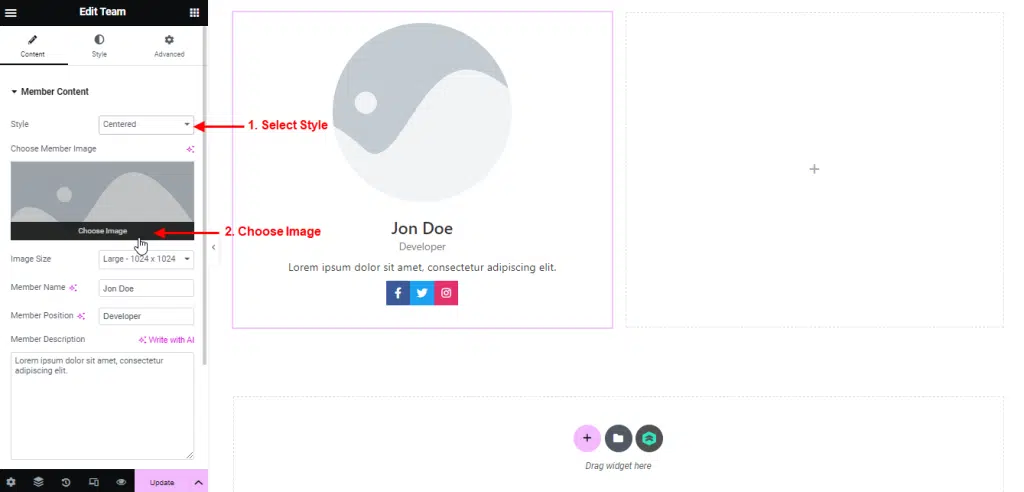
- Select Style.
- Upload your team image from the media files or from your own file.
- Click Choose Image.

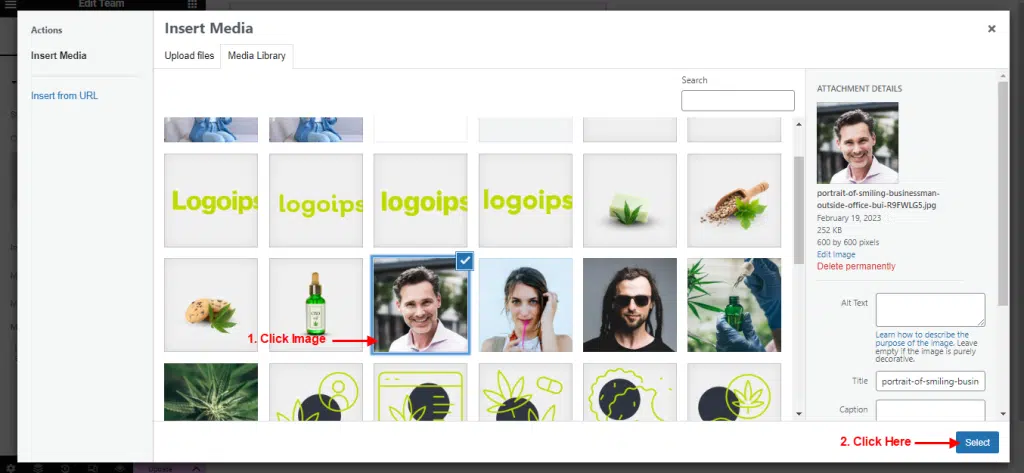
- Click Image → click Select Button.

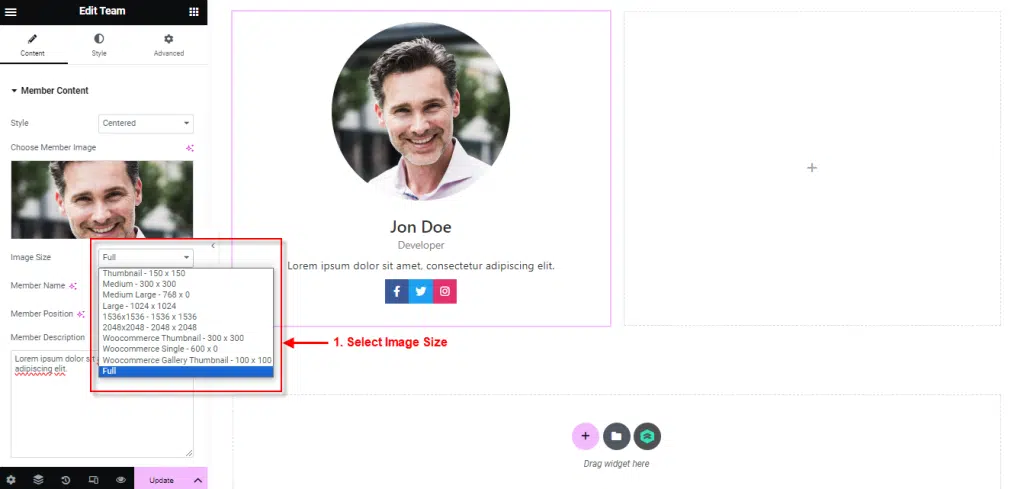
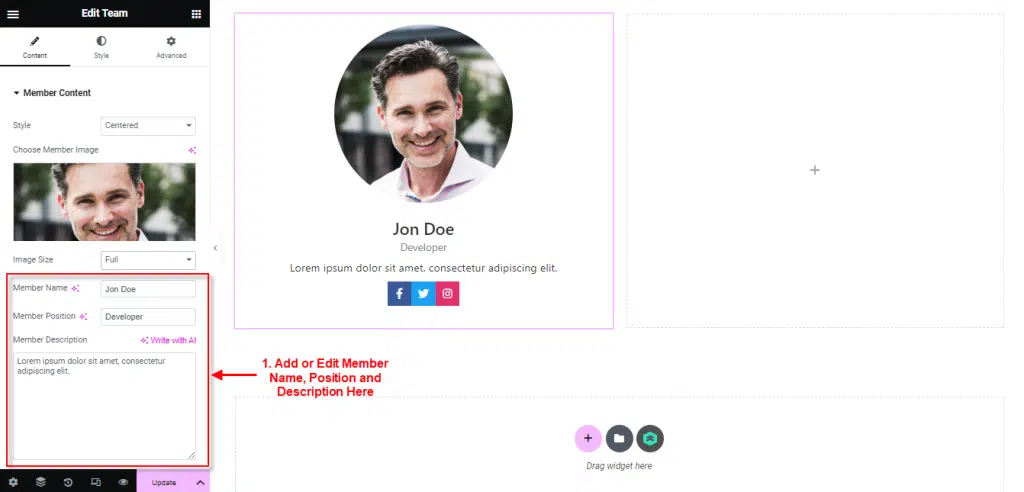
- Add or Edit Member Name, Position, and Description.
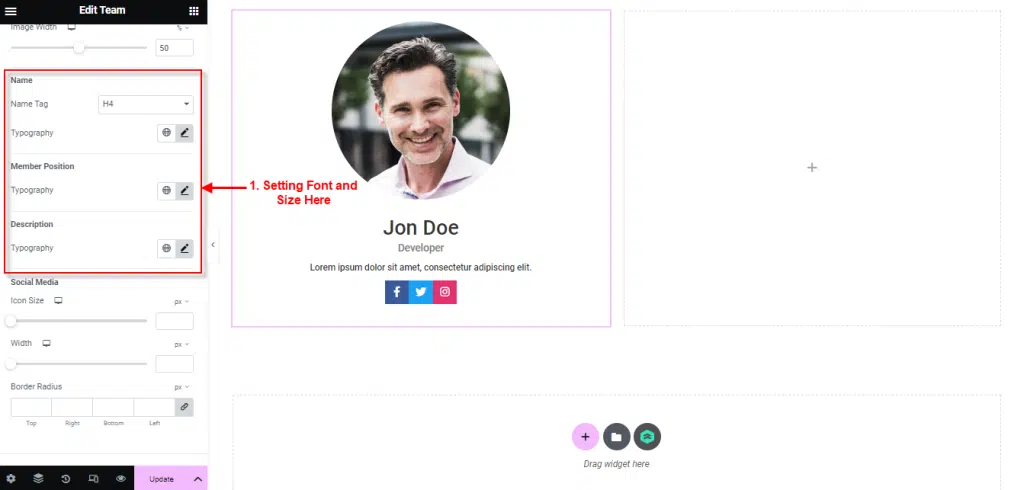
Setting Font and Size
- Click Menu Style → click Style.
- You can change Font and Size Name, Position, Description like picture below.

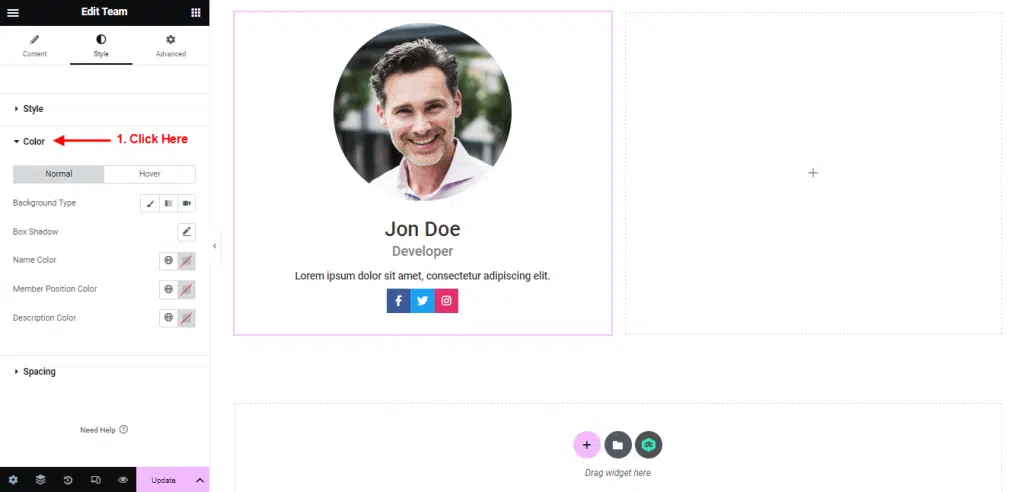
Change Color
Change Background Color :
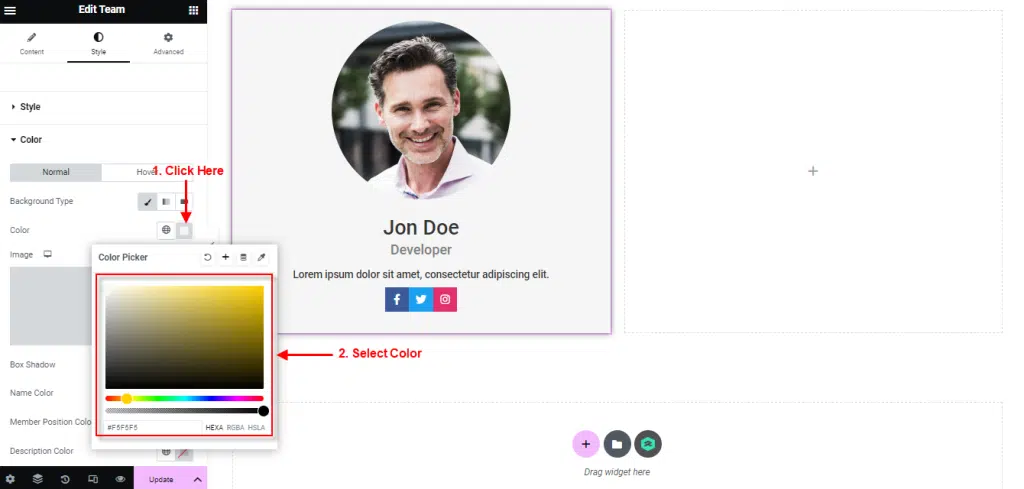
- Click Background Type → Select Color in global color.
- Click Specific Color to select another color → Select Color.
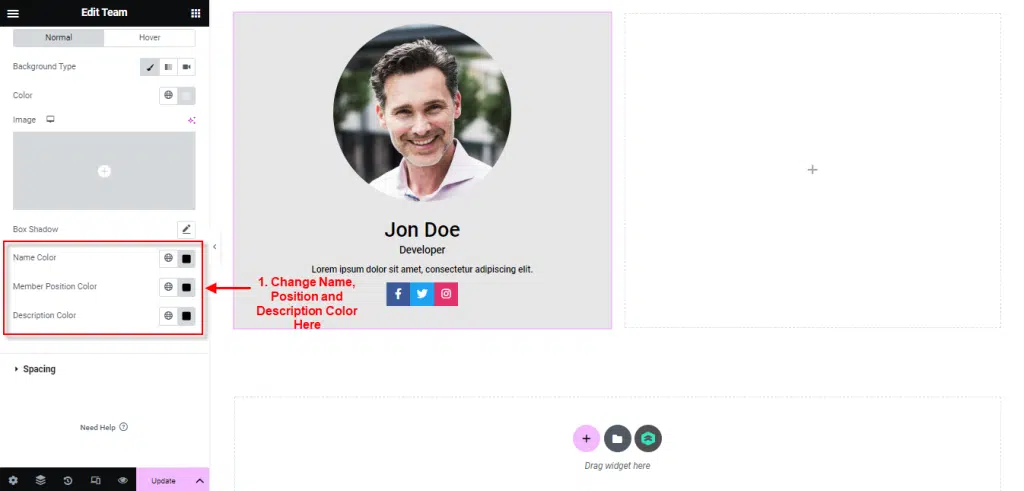
- You can Change Name Color, Member Position, and Description like picture below.
- Click global color → Select Color.
- Click Specific Color to select another color → Select Color.